
Computational thinking and making are powerful tools you can use to solve problems and design solutions. The combination of physical and digital devices (physical computing) takes this a step further, by allowing you to create interactive systems. Physical computing in the computer Science curriculum is important as it helps learners see the relevance of Computer Science to the world around them.
One example of a physical computing project is making a Microbit Step Counter. This project will show you how to use computational thinking and making to create a Step Counter that can be used to count your steps. It is a great way to learn about how to use sensors and inputs to create an interactive system.
Introduction to Step counters
Walking is a very important exercise. It is a low-impact activity that can lead to numerous health benefits, including improved cardiovascular health, increased muscle strength, and better joint mobility. There are so many apps or fitness watches which keep track of your daily steps, but have you ever wanted to make your own step counter?
What is a Step counter?
A Step counter is a device that counts the number of steps you take. It is often used to track fitness data or as part of a weight loss plan.
How does it work?
Step counters use an accelerometer to detect when you take a step and then count each step you take. The data is then stored in memory so you can track your progress over time.
Why use Microbit?
Microbit is a great platform for creating Step counters because it has an onboard accelerometer and can easily be programmed to count steps. Microbit is also very portable, so you can take it with you wherever you go. With Microbit, it is very easy to create a DIY step counter which will count the number of steps you walk. Microbit is a small computer that can be programmed to do many things.

In this Microbit project, we will use Microbit to create our own step counter. This project is perfect for people who want to get started with coding and hardware hacking.
A Microbit accelerometer can be used to track the number of steps you walk. The accelerometer is a sensor that detects movement. When you walk, your body moves, and this movement is detected by the accelerometer. By counting the number of times, the accelerometer detects movement, we can calculate the number of steps you have walked. However, in this blog, we will learn to make a customized Microbit step counter that will detect steps according to my walking movement.
Let’s start making our own Customized Step Counter
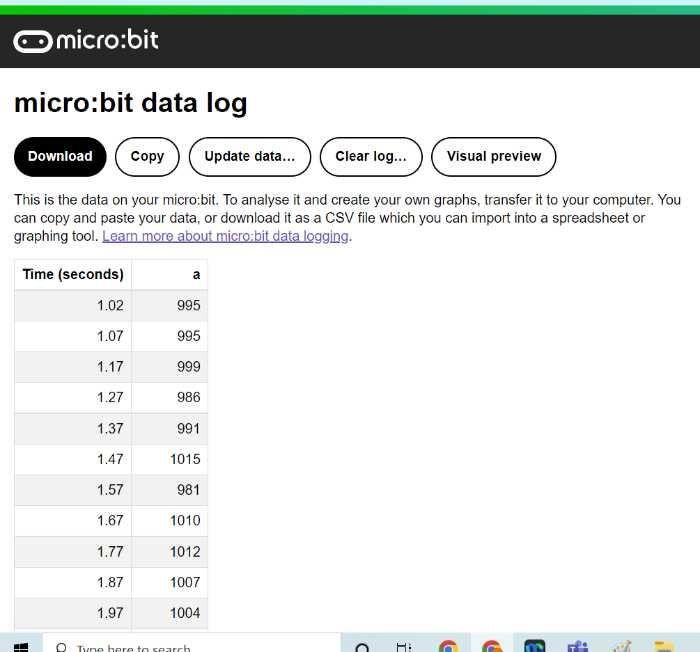
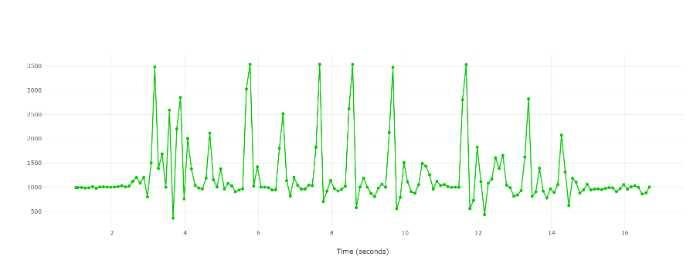
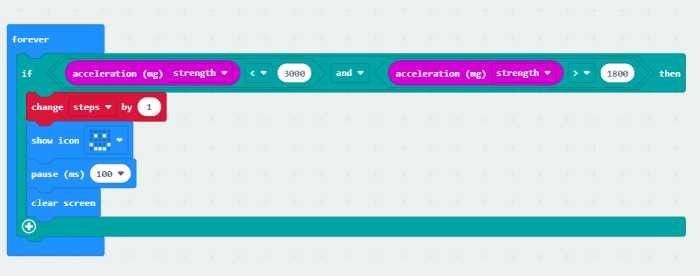
For the customized step counter, we need to have acceleration values related to our walking style. We can find these values by carrying out some tests. We need to walk in for let’s say 10 steps and then note down the maximum and minimum acceleration strength values in mG. These values will be different for different people according to their walking styles. The next step is to program the Microbit to detect steps according to these acceleration values.
We will start by noting down the minimum and maximum acceleration. For this, we need to program the Microbit to display the acceleration after 0.5 sec. After this, we need to attach the microbit to our leg or shoe and walk and note down the values. It becomes very difficult to see the acceleration value on the microbit as you walk. So, to make the process of taking readings easier the data logging feature of microbit is used.
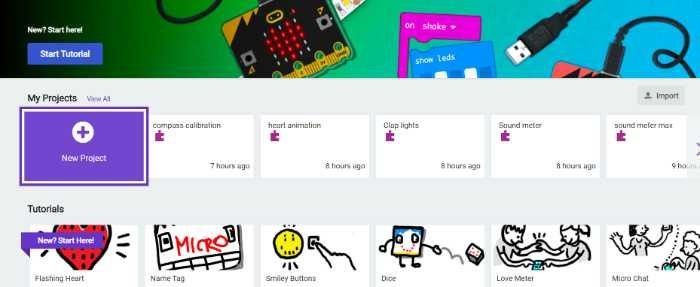
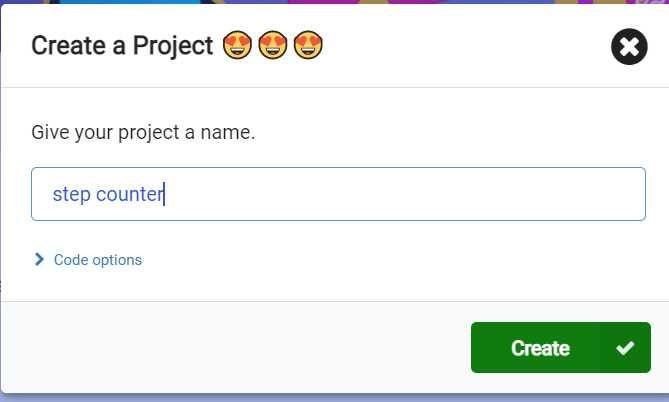
The first step is to code the Microbit to record the acceleration values. For coding the Microbit we will use the Makecode platform which can be accessed at (https://makecode.microbit.org/). Click on the new project to start coding. Online coding platforms like Makecode use a graphical programming language. This means that instead of writing lines of code, we can drag and drop blocks of code to create our program. Kids coding classes use graphical programming languages because they are easy to use and understand. More information about graphical or Block based programming can be accessed here.
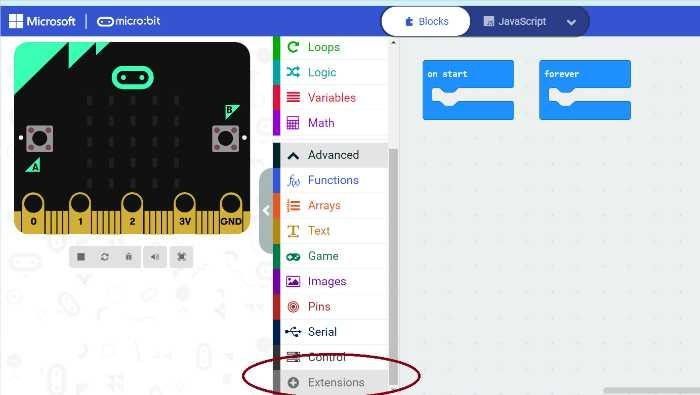
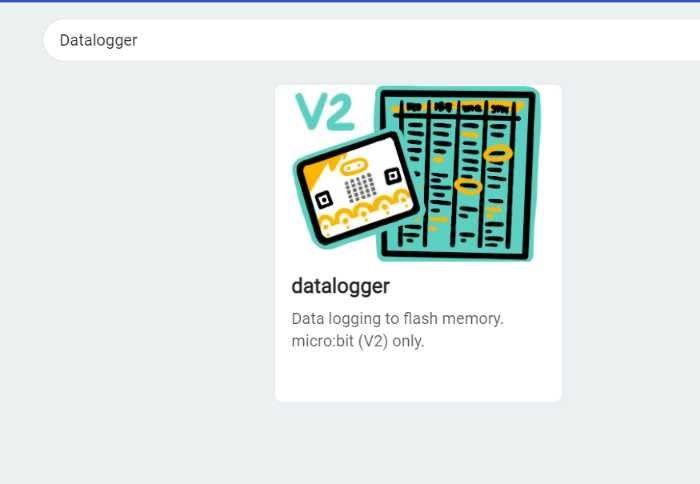

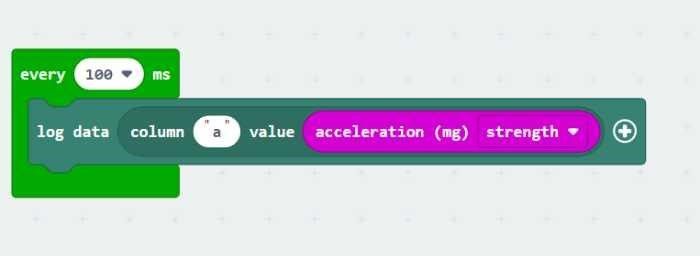
Now we need to drag and drop the blocks and stack them together to make the code work. We will be using blocks from the loop category and the data logger section. The idea is to get a log of the acceleration values (acceleration strength) for a particular time period. The code shown below is downloaded on the Microbit.
Datalogging is the process of storing data in a digital format. Data can be stored in a text file, an image file, or a database. Datalogging is often used to collect data from sensors, such as temperature sensors, light sensors, and motion detectors.
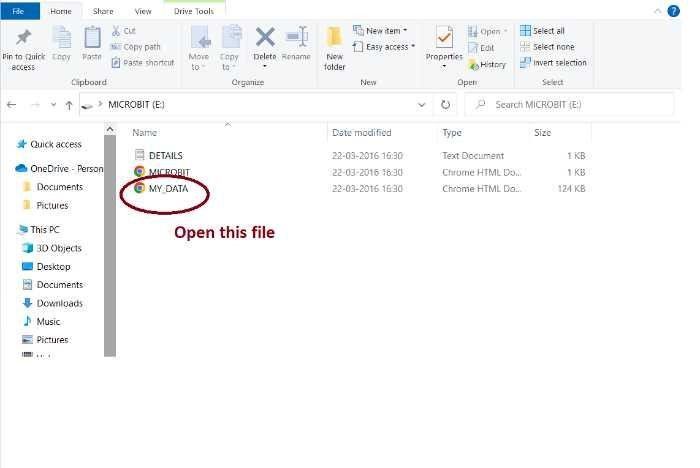
As the Microbit is ready to data log the user should also start walking. The user can walk for 2-3 mins to get the acceleration values. After this, we need to attach the Microbit to the laptop again. Now open the Microbit drive.
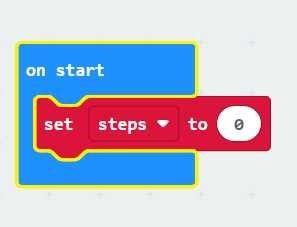
Now that we are done with the testing for acceleration values let’s proceed ahead to code our Step counter. Open Makecode and start coding. We will make a variable step so as to store the values of the actual steps. On the start, we will initialize the variable to zero.
Conclusion:
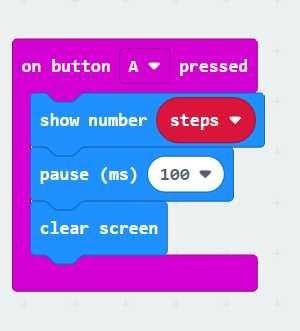
In this project, we have built our own Step Counter with Microbit. We have also learned about Data logging and how it works. This Step Counter can be further improved by adding more blocks to show the number of steps taken in a certain time period or distance covered. This will help people to keep track of their fitness journey. If you want to make your own Microbit step counter and take your child’s coding skills to the next level, then Book a FREE trial class. Coding classes can teach kids how to code websites, apps, and games. They will also learn important problem-solving skills. In addition, coding classes can help kids build confidence and make friends. Try out different projects and have fun! Happy Coding! 🙂
By – Dr. Kadam Bhambari , an Educator at SkoolofCode with Ph.D. and MTech in Electronics. She is an expert in Microbit, Arduino, and Artificial intelligence.