
In today’s digital age, understanding the basics of web designing is becoming as essential as learning to read or write. Imagine sitting down with your child to create a vibrant, interactive website from scratch. Whether your child is a budding tech enthusiast or simply curious about how websites work, learning web design can be a fun and educational journey.
With EduBlocks, a platform specifically designed to teach kids coding engagingly, you and your child can explore the world of web designing using HTML, CSS, and JavaScript. And now, with SkoolOfCode’s comprehensive web design curriculum using EduBlocks, this learning adventure is more accessible than ever. Ready to get started with the best coding classes for kids? Let’s dive in.
Web designing is much more than simply arranging text and images on a screen; it’s the art and science of creating a digital experience. Just as a painter carefully chooses colors and brushstrokes to evoke emotion, or an architect meticulously plans a building’s structure and flow, a web designer thoughtfully combines aesthetics and functionality to craft an engaging, user-friendly website. Let’s delve deeper into the key components that make up web design and explore how they work together to create seamless digital experiences.
Key Components of Web Designing
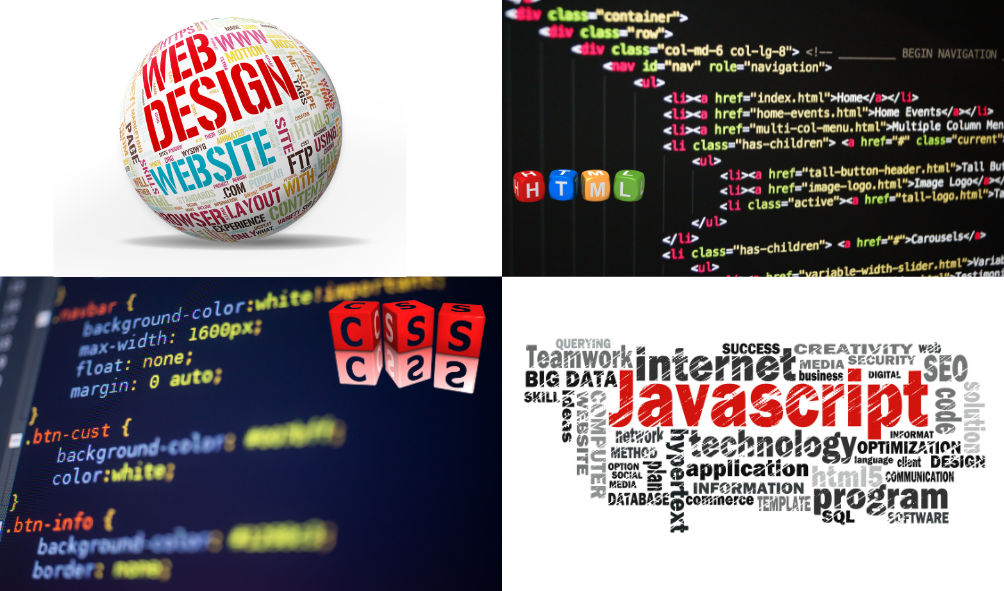
- HTML (HyperText Markup Language): The Structural Framework
HTML forms the foundation of web design, much like the skeletal structure of a building. It’s a markup language that defines the elements of a webpage, such as headings, paragraphs, links, and images. Each HTML tag acts as a building block that tells the browser how to display the content. Imagine HTML as the blueprint of your digital house, determining where each piece of content should go. Without HTML, there would be no structure or organization to the information presented on a website.
- CSS (Cascading Style Sheets): The Stylistic Flair
If HTML is the structure, CSS is the design element that adds personality to a website. CSS is responsible for the visual styling—colors, fonts, spacing, and overall layout—giving your site its unique look and feel. Think of CSS as the interior decorator who decides on the wallpaper, flooring, and furniture placement to create a welcoming environment. With CSS, you can transform a plain HTML page into a vibrant, visually appealing site that reflects your brand or message. The term “cascading” refers to the way styles can be applied hierarchically, allowing for complex designs and easy maintenance.
- JavaScript: The Interactive Elements
JavaScript is the programming language that adds a layer of interactivity and dynamism to web design. While HTML provides the structure and CSS adds style, JavaScript enables users to interact with the webpage in meaningful ways. It can be used to create anything from simple effects like image sliders to complex functionalities like real-time form validation, interactive maps, or even games. JavaScript is the behind-the-scenes magician, turning static designs into engaging experiences by responding to user actions, such as clicks, hovers, or keystrokes.
Why Learn Web Designing?
Learning web designing isn’t just about building websites; it’s about building skills that last a lifetime.
Here’s why enrolling your child in coding classes for kids is worth your time:
- Creativity: Web design is a fantastic way for children to express their creativity. They can dream up a concept and bring it to life visually.
- Problem-Solving: Children will develop critical problem-solving skills as they learn to code. They’ll learn to break down complex problems into smaller, manageable parts—a skill valuable in any area of life.
- Future-Proof Skills: In a world increasingly driven by technology, computer programming for kids is a future-proof skill that opens doors to many career opportunities.
- Collaboration: Working on web design projects fosters teamwork and communication skills. Whether they’re working with friends or discussing their projects with you, they’re learning to share ideas and collaborate effectively.
A Story of Creativity and Learning: “Ella and the Magic of Web Designing”
To help illustrate just how exciting and accessible web designing can be, let’s take a look at a fun story about a young girl named Ella and her father, James, as they embark on their first web design adventure together using EduBlocks through online coding classes for kids.
Ella and the Magic of Web Designing
Nine-year-old Ella watched her older sister browse fun, colourful websites and felt inspired. “Dad, I want to make my website!” she exclaimed.
Her father, James, grinned. “Let’s learn together. We can use Edublock—a platform that makes coding simple with drag-and-drop blocks.”
Ella’s curiosity piqued. “Like building with digital blocks?”
“Exactly,” James replied, opening his laptop. “Let’s start with HTML—it’s like the framework of a house.”
With James’s guidance, Ella dragged and dropped colorful blocks labelled <html>, <head>, and <body> onto the screen. “It’s like we’re sending a secret message to the computer!” she giggled.

They added a bold heading: “Welcome to Ella’s Amazing Adventure!” Ella clapped. “Can we add a picture of a puppy?”
“Sure! Now let’s make it beautiful with CSS,” James continued. They changed the background to blue and the text to pink. Ella’s eyes sparkled. “This is so cool, Dad!”
“Now for some magic—JavaScript,” James said. “It makes websites interactive.”
Ella’s eyes widened. “Can we make something move?”
James nodded. “How about a button that makes the puppy wag its tail?” With a few more clicks, the puppy on their screen sprang to life. Ella squealed with delight as she clicked the button, watching the tail wag faster each time.
“Wow! I made it move!” she shouted.

James smiled. “You did, and this is just the beginning. With these tools, you can create anything.”
Ella beamed. “Let’s make more pages with kittens and a treasure hunt!”
“Absolutely,” James said, hugging his daughter. “We can build anything you imagine.”
And so, that sunny afternoon turned into a magical adventure in creativity and learning. By the end of the day, Ella had created a colourful, interactive website and discovered the joy of turning her imagination into reality. As she drifted off to sleep, her mind buzzed with new ideas, excited for the next day of web design magic.
What is EduBlocks ?
EduBlocks is a versatile educational tool designed to introduce children and beginners to various coding and programming concepts in a fun and interactive way. It offers a block-based interface that allows users to learn and practice coding in several programming languages and environments, including Python, HTML, Microbit, CircuitPython, and Raspberry Pi.
Key Features of EduBlocks:
- Python: EduBlocks provides a visual interface for Python, one of the most popular programming languages. By using drag-and-drop blocks that represent Python code, learners can easily understand Python syntax and logic, making it an ideal first step for young coders.
- HTML: EduBlocks also supports HTML, the foundational language of the web. This feature allows students to explore web development basics, understanding how web pages are structured and styled, and fostering a foundational skill set for creating their own websites.
- micro:bit: EduBlocks offers integration with micro:bit, a tiny programmable computer designed for teaching coding and electronics. By coding with blocks in EduBlocks, students can easily create programs that run on the Microbit, exploring basic electronics, sensor inputs, and simple robotics.
- CircuitPython: With EduBlocks, learners can delve into CircuitPython, a version of Python designed for microcontrollers. This feature introduces students to physical computing and allows them to interact with hardware components, further developing their understanding of electronics and coding.
- Raspberry Pi: EduBlocks supports programming on the Raspberry Pi, a popular single-board computer used in education for various computing projects. Through EduBlocks, students can engage in hands-on learning with the Raspberry Pi, from controlling LEDs and sensors to building more complex projects.
EduBlocks is particularly beneficial for educational institutions like SkoolOfCode, which aim to provide a holistic STEM-based curriculum. It supports educators in introducing diverse programming languages and platforms in an accessible and engaging way, fostering a deep understanding of coding concepts across different technologies. This approach helps cultivate a broad skill set in young learners, preparing them for more advanced studies in computer science and engineering.
Step 1: Understanding the Basics of HTML
Begin with the building blocks—HTML. EduBlocks makes it easy for children to understand the basics by allowing them to drag and drop HTML elements to create a simple web page. Here’s a fun project to get started:
Project Idea: My First Web Page
- Create a Basic Structure: Guide your child in creating a basic HTML document with <!DOCTYPE html>, <html>, <head>, and <body> tags. Think of it as laying the foundation and framework for their digital creation.
- Add Content: Encourage your child to add a title, headings, and paragraphs using <title>, <h1>, and <p> tags. They could write a short introduction about themselves, a story, or even a fun fact!
- Include an Image: Teach them how to insert an image using the <img> tag. They can choose a picture that represents their favorite hobby or pet, making their website personal and unique.
This project will give your child a solid foundation in how web pages are structured, providing them with the confidence to explore further.
Step 2: Styling with CSS
Once your child is comfortable with HTML, it’s time to make their web page more appealing with CSS. EduBlocks intuitive interface simplifies the process of applying styles to the webpage.
Project Idea: Styling My Web Page
- Change Background Color: Teach your child to use the background-color property to change the page’s background. They can experiment with different colors to find their favorite!
- Customize Text: Show how to experiment with different fonts, colors, and sizes using the font-family, color, and font-size properties. They can make their text stand out with their unique style.
- Create a Layout: Use CSS to arrange content with properties like margin, padding, and border. This step introduces them to the concept of layout, helping them understand how to make their web page look neat and organized.
By the end of this project, your child’s web page will look vibrant and polished. Encourage them to try different styles and layouts—this is their chance to get creative.
Step 3: Adding Interactivity with JavaScript
Now that the web page is well-structured and beautifully styled, it’s time to add interactivity with JavaScript. Don’t worry if this seems challenging; EduBlocks block-based coding approach makes it easy for kids to understand.
Project Idea: Interactive Web Page
- Create a Button: Show your child how to create a button using the <button> tag. This simple element can be used to introduce interactive features.
- Add an Alert: Teach them how to use JavaScript to display a message when the button is clicked. This introduces them to the concept of events and how websites can respond to user actions.
- Interactive Content: Explore more complex interactivity, like changing text color on mouse hover or showing hidden content when a button is clicked. This will help them understand the dynamic nature of web design.
This project will give your child a taste of how JavaScript makes websites dynamic and interactive, transforming them from static pages to engaging experiences.
Tips for Parents

- Be Patient: Learning to code can be challenging at first. Encourage your child to experiment and learn from their mistakes. Remind them that every coder starts as a beginner!
- Collaborate: Work on projects together. It’s a great way to bond and also gives your insight into the learning process, helping you understand the challenges your child might face.
- Use Online Resources: Leverage the vast array of tutorials and resources available online to supplement learning with SkoolOfCode’s curriculum. These can provide additional tips, tricks, and projects.
- Celebrate Progress: Every completed project is an achievement. Celebrate these milestones to keep your child motivated and excited about their learning journey.
SkoolOfCode’s EduBlocks Curriculum
SkoolOfCode offers a tailored curriculum designed to guide young learners through the basics of web designing using the EduBlocks platform. The curriculum is structured to build foundational skills in HTML, CSS, and JavaScript, progressing from simple drag-and-drop coding to more advanced concepts. With hands-on projects, interactive lessons, and a focus on creativity and problem-solving, SkoolOfCode ensures that learning web design is not just educational, but also fun and engaging.
The curriculum is perfect for children of all ages and skill levels, from those just beginning to explore coding to more advanced learners looking to deepen their understanding. SkoolOfCode’s approach emphasizes not only technical skills but also critical thinking, creativity, and collaboration—skills that are invaluable in any field, making it one of the best coding classes for kids.
Conclusion
Web designing with HTML, CSS, and JavaScript is more than just creating websites—it’s a gateway to creativity, critical thinking, and future career opportunities. With SkoolOfCode’s EduBlocks curriculum, this journey becomes an exciting adventure for both parents and children.
Ready to start this exciting journey with your child? Enrol in SkoolOfCode’s online coding classes for kids today and watch them transform from curious learners into confident coders. Don’t miss out on this opportunity to bond, learn, and create something amazing together. Click here to sign up now and take the first step into the world of web design.
Ms.Manpreet Virk, an educator at SkoolOfCode with a degree in M.Phil and Master in Computer Science. She is passionate about learning and teaching young minds.